After completing this unit, you’ll be able to:
Jennifer expects this data to have point geometry, but currently, it only exists as tabular data. However, she has Latitude and Longitude attributes, so she knows she can use the VertexCreator transformer to generate points.
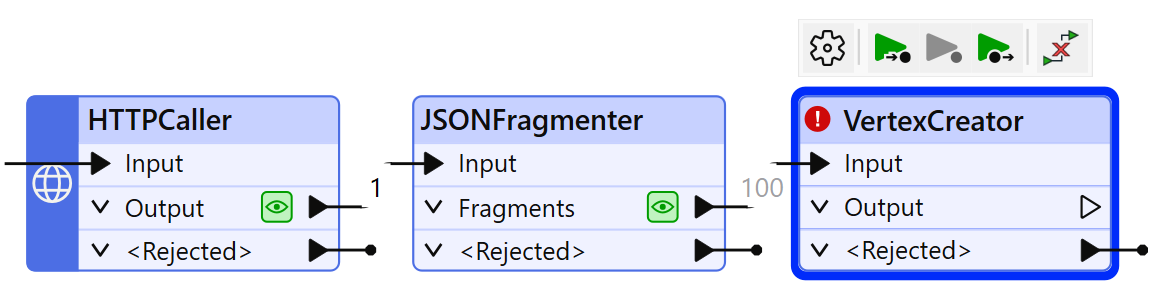
She adds one after the JSONFragmenter using Quick Add:
She double-clicks it to open its parameters and configures them like this:
| X Value | Longitude |
| Y Value | Latitude |
She clicks OK to close the dialog.
⭐ New for FME 2024.2: you can now set feature coordinate systems directly in the VertexCreator. If you are using 2024.1 or later, feel free to set it to LL84 and then skip to the Add Geodatabase Writer step below.
Note that the instructions for the rest of the course assume you used the JSONFragmenter's Attributes To Expose parameter instead of an AttributeExposer. The screenshots might look slightly different, but the workspace will function similarly.
Jennifer clicks the Run button to run her workspace.
The VertexCreator transformer runs and creates point geometry for her features.
She inspects the cache using Visual Preview.
However, she can tell her points are not aligned with the background map. She expects to see the points located in the area around Vancouver, British Columbia, Canada, but they are not there:
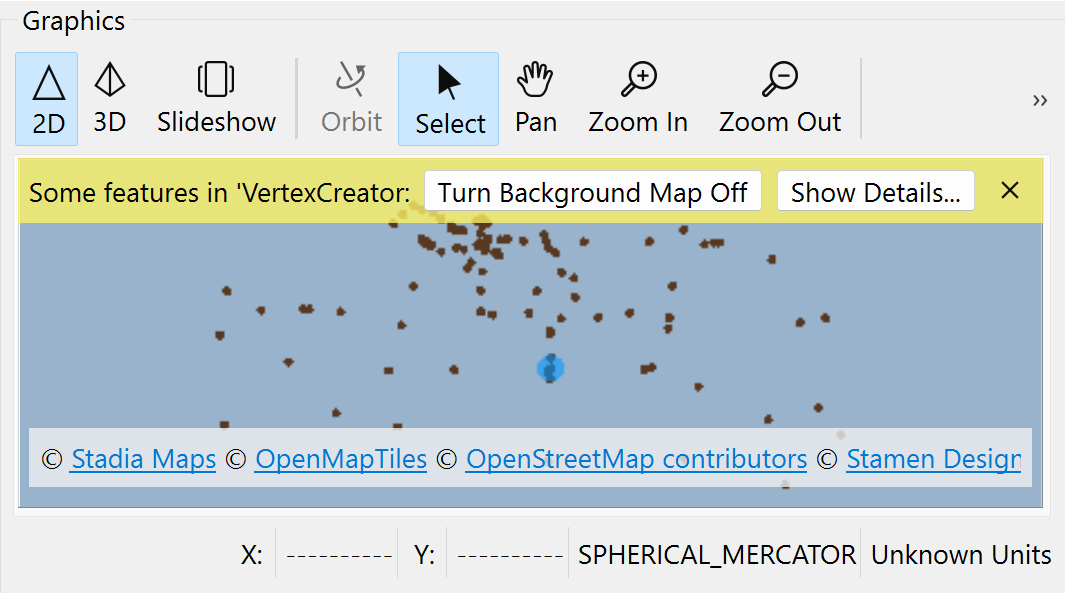
That's because they don't have a coordinate system defined. There are clues Jennifer uses to determine this is a coordinate system problem:
To fix this problem, Jennifer adds a CoordinateSystemSetter after the VertexCreator.
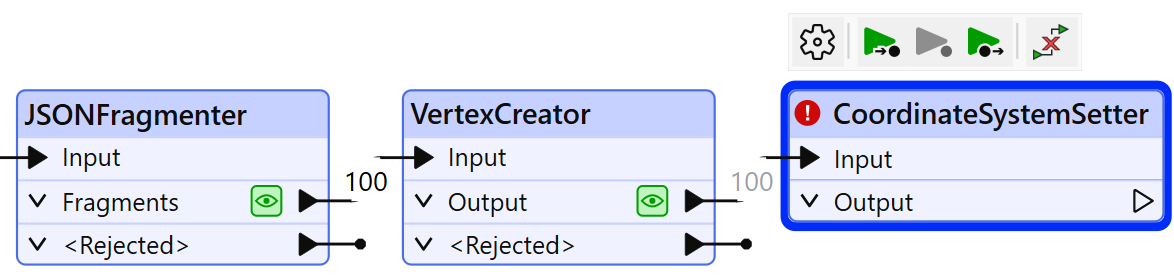
She opens its parameters and sets Coordinate System to LL84, then clicks OK.
FME automatically reads coordinate systems when reading from spatial data. However, since we created the points from attributes, no coordinate system information is available to read. So, we have to manually define the system.
She runs her workspace.
Then she inspects the results of the CoordinateSystemSetter's Output port. She sees 100 point features, correctly located in the Vancouver area:
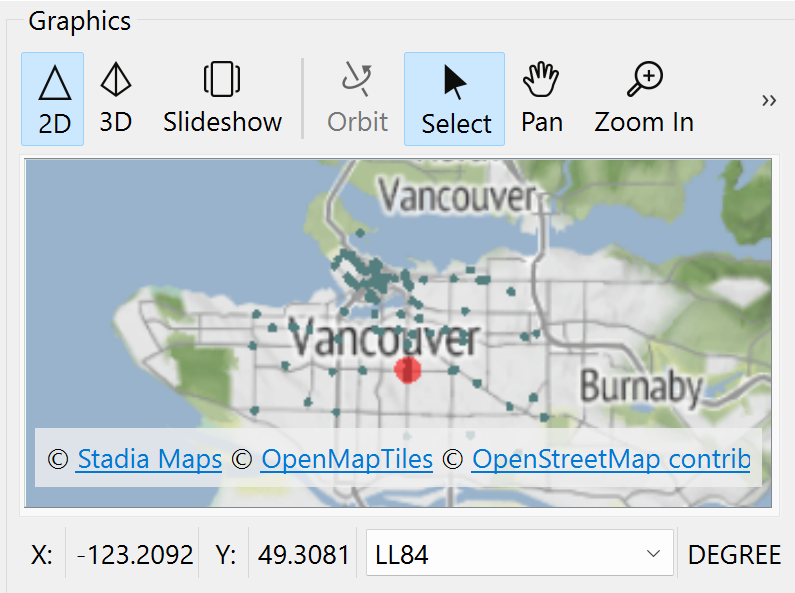
Map tiles © Stadia Maps, © OpenMapTiles, © OpenStreetMap contributors, © Stamen Design
Now that her data has the correct attributes and geometry, it's time to write it out to geodatabase.
She types Esri Geo and Quick Add opens. She notices there are many geodatabase formats available in FME. She chooses the one called Esri Geodatabase (File Geodb Open API) under the Writers header. This format does not require an Esri licesnse to use.
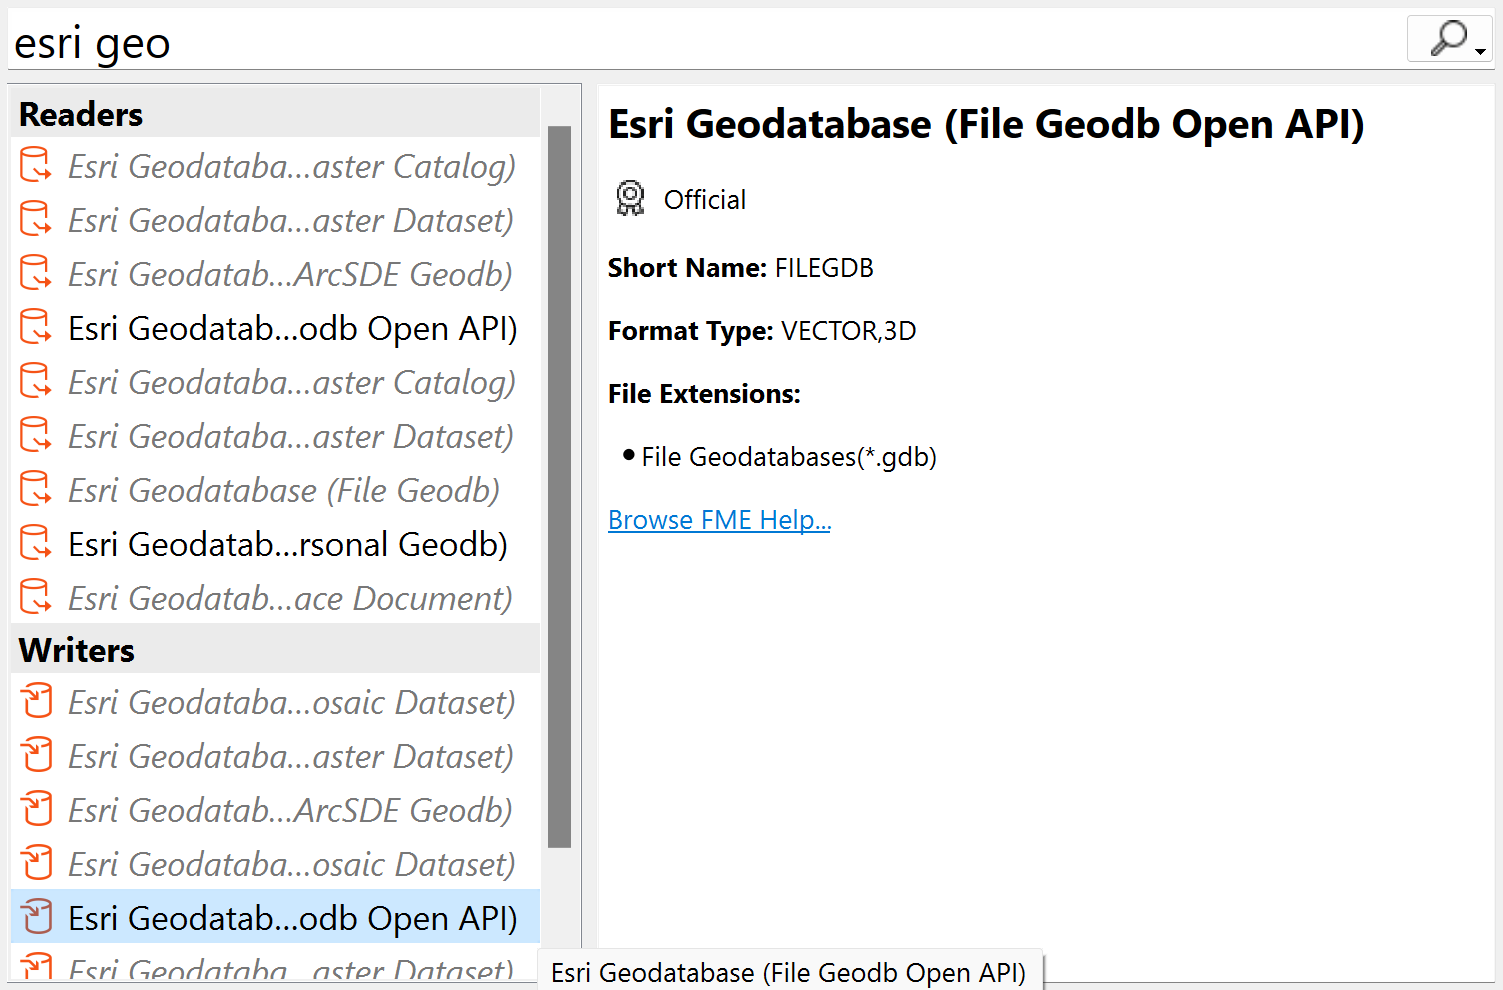
Make sure you are selecting Esri Geodatabase (File Geodb Open API) under the Writers section. People often accidently select from the Readers section here, which is not what we want.
Once she has selected that format in the Quick Add list, making sure to select the one under Writers and not Readers, she hits Enter or double-clicks it.
The Add Writer dialog opens. She sets the Dataset parameter to C:\FMEData\Output\Training\BusinessOwners.gdb. The writer will create this folder if it does not already exist:
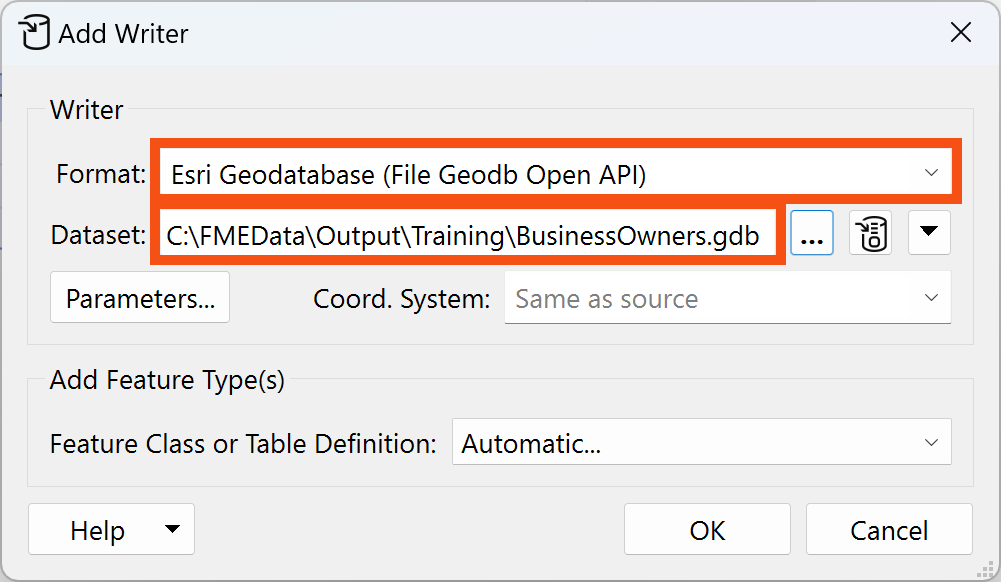
She then clicks the Parameters button:
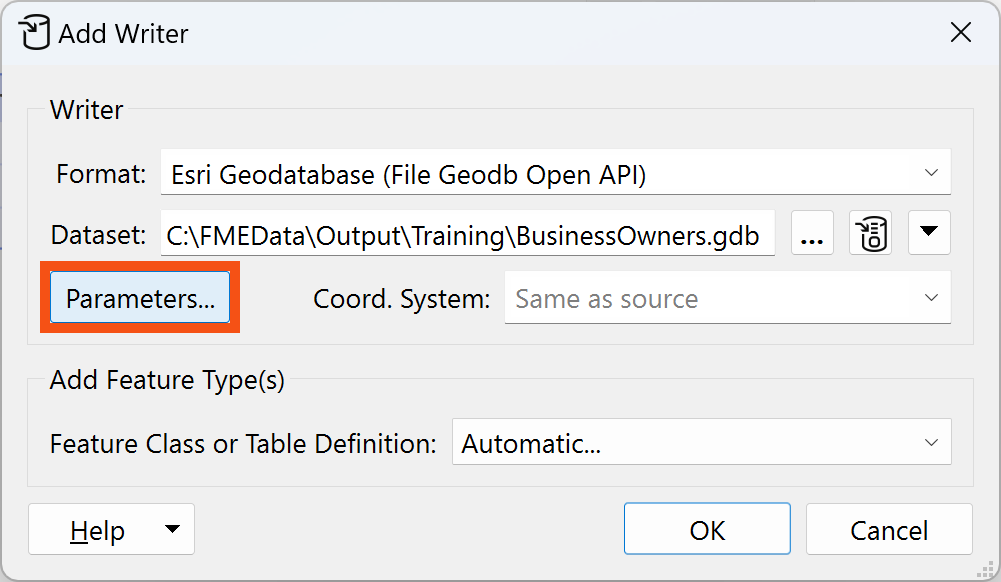
She enables Overwrite Existing Geodatabase:
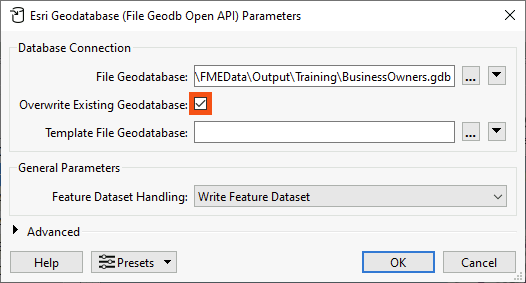
She clicks OK to add the writer.
We'll leave the Feature Class or Table Definition mode as Automatic, the default. This setting means the writer feature type will adopt the schema of any features connected to it. We'll discuss schema handling more in the coming lessons.
She sets Feature Class or Table Name to BusinessOwners. She sets the Geometry to geodb_point:
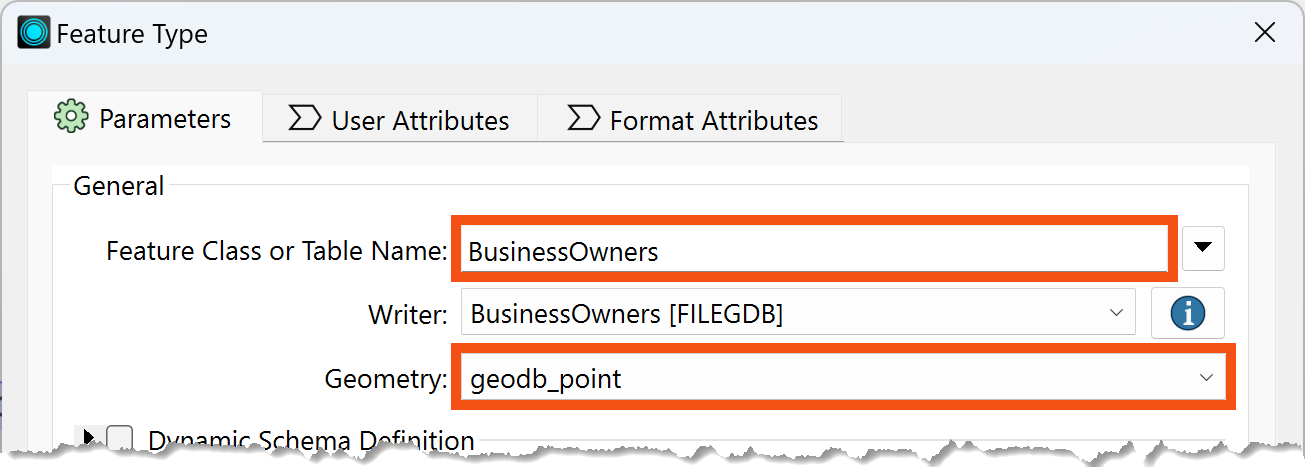
She clicks OK to add the writer feature type.
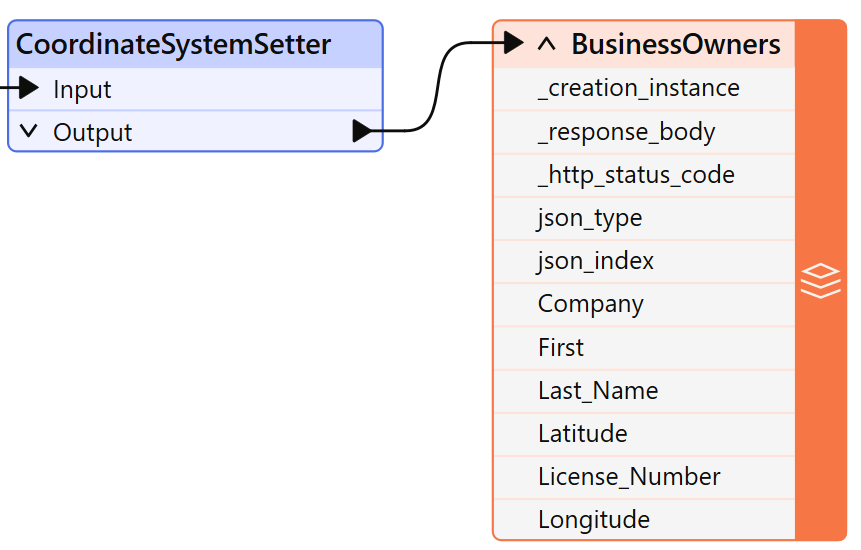
She connects the CoordinateSystemSetter's Output port to the new BusinessOwners writer feature type:
To tidy up her workspace, Jennifer adds two bookmarks.
She selects all her transformers by clicking and dragging, then right-clicks one and chooses Insert Bookmark. She renames it Source Data:

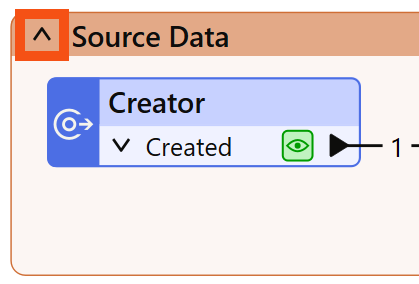
Then she clicks the up-pointing arrow next to Source Data to collapse the bookmark, hiding the work required to read her data:
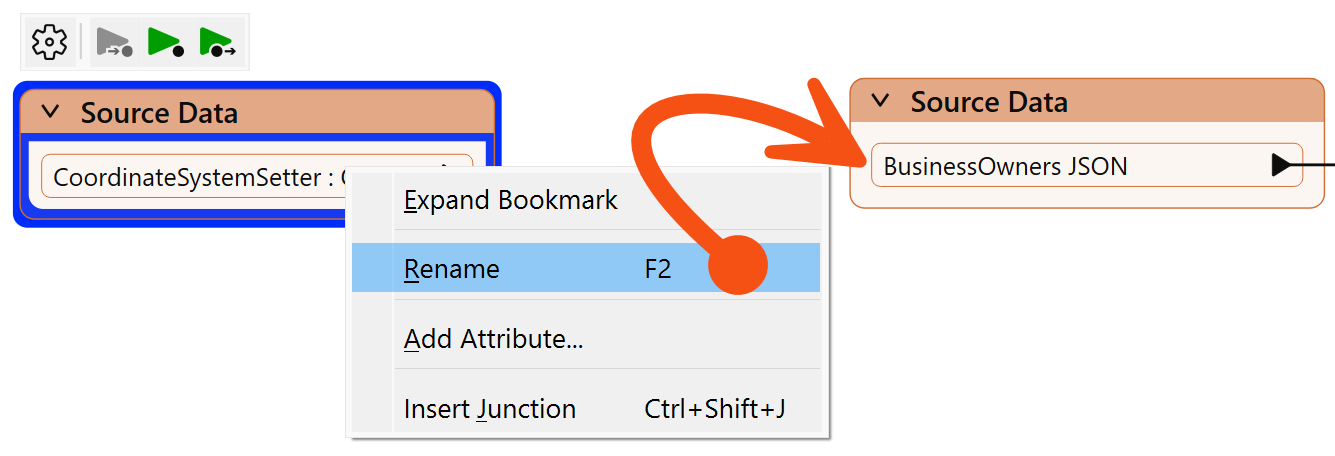
She adjusts the width of the bookmark to take up less space on the canvas by clicking and dragging the edge of the bookmark. Then she right-clicks the CoordinateSystemSetter : Output port, chooses Rename, and calls it BusinessOwners JSON:
She adds a bookmark (right-click > Insert Bookmark or Ctrl/Cmd+B) around her writer feature type and calls it Writer Feature Types:
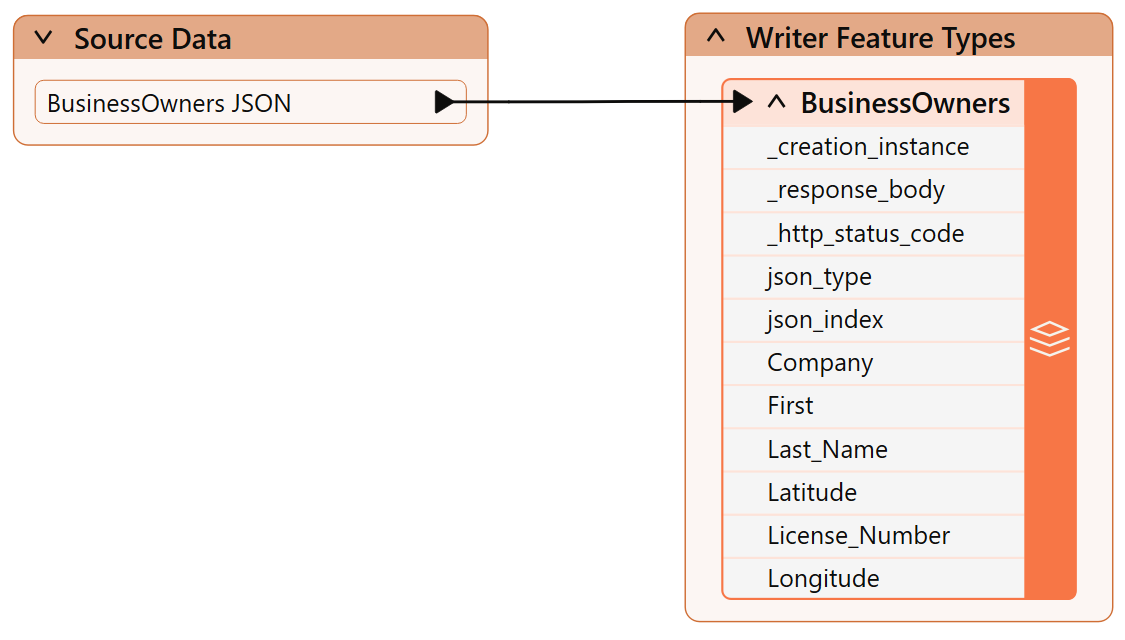
Jennifer clicks Run to run her workspace and convert her data.
After the workspace has run, the Translation Log reports that the “Translation was Successful.” Jennifer selects the writer feature type and clicks Open Containing Folder to confirm the geodatabase has been created.
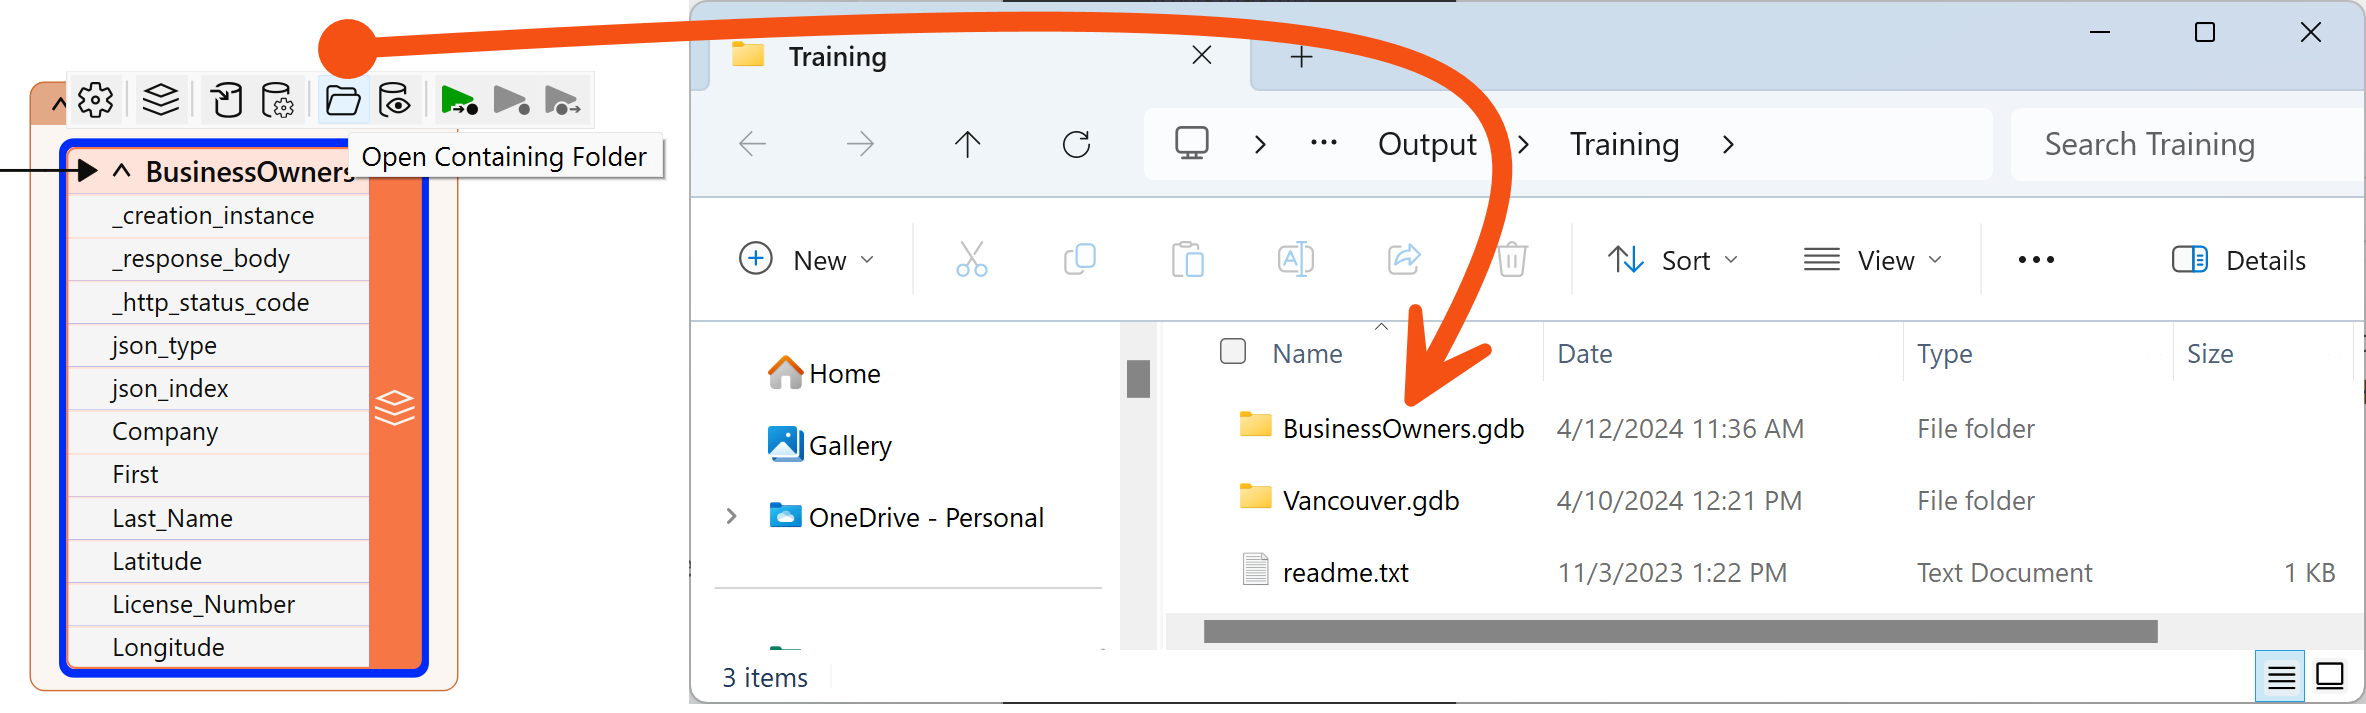
Jennifer is off to a good start. She has created a new geodatabase from JSON with the business owner data loaded into it. Next, she has to edit the schema.
Follow along with Jennifer’s steps.
After completing this unit, you’ll be able to:
Jennifer expects this data to have point geometry, but currently, it only exists as tabular data. However, she has Latitude and Longitude attributes, so she knows she can use the VertexCreator transformer to generate points.
She adds one after the JSONFragmenter using Quick Add:
She double-clicks it to open its parameters and configures them like this:
| X Value | Longitude |
| Y Value | Latitude |
She clicks OK to close the dialog.
⭐ New for FME 2024.2: you can now set feature coordinate systems directly in the VertexCreator. If you are using 2024.1 or later, feel free to set it to LL84 and then skip to the Add Geodatabase Writer step below.
Note that the instructions for the rest of the course assume you used the JSONFragmenter's Attributes To Expose parameter instead of an AttributeExposer. The screenshots might look slightly different, but the workspace will function similarly.
Jennifer clicks the Run button to run her workspace.
The VertexCreator transformer runs and creates point geometry for her features.
She inspects the cache using Visual Preview.
However, she can tell her points are not aligned with the background map. She expects to see the points located in the area around Vancouver, British Columbia, Canada, but they are not there:
That's because they don't have a coordinate system defined. There are clues Jennifer uses to determine this is a coordinate system problem:
To fix this problem, Jennifer adds a CoordinateSystemSetter after the VertexCreator.
She opens its parameters and sets Coordinate System to LL84, then clicks OK.
FME automatically reads coordinate systems when reading from spatial data. However, since we created the points from attributes, no coordinate system information is available to read. So, we have to manually define the system.
She runs her workspace.
Then she inspects the results of the CoordinateSystemSetter's Output port. She sees 100 point features, correctly located in the Vancouver area:
Map tiles © Stadia Maps, © OpenMapTiles, © OpenStreetMap contributors, © Stamen Design
Now that her data has the correct attributes and geometry, it's time to write it out to geodatabase.
She types Esri Geo and Quick Add opens. She notices there are many geodatabase formats available in FME. She chooses the one called Esri Geodatabase (File Geodb Open API) under the Writers header. This format does not require an Esri licesnse to use.
Make sure you are selecting Esri Geodatabase (File Geodb Open API) under the Writers section. People often accidently select from the Readers section here, which is not what we want.
Once she has selected that format in the Quick Add list, making sure to select the one under Writers and not Readers, she hits Enter or double-clicks it.
The Add Writer dialog opens. She sets the Dataset parameter to C:\FMEData\Output\Training\BusinessOwners.gdb. The writer will create this folder if it does not already exist:
She then clicks the Parameters button:
She enables Overwrite Existing Geodatabase:
She clicks OK to add the writer.
We'll leave the Feature Class or Table Definition mode as Automatic, the default. This setting means the writer feature type will adopt the schema of any features connected to it. We'll discuss schema handling more in the coming lessons.
She sets Feature Class or Table Name to BusinessOwners. She sets the Geometry to geodb_point:
She clicks OK to add the writer feature type.
She connects the CoordinateSystemSetter's Output port to the new BusinessOwners writer feature type:
To tidy up her workspace, Jennifer adds two bookmarks.
She selects all her transformers by clicking and dragging, then right-clicks one and chooses Insert Bookmark. She renames it Source Data:
Then she clicks the up-pointing arrow next to Source Data to collapse the bookmark, hiding the work required to read her data:
She adjusts the width of the bookmark to take up less space on the canvas by clicking and dragging the edge of the bookmark. Then she right-clicks the CoordinateSystemSetter : Output port, chooses Rename, and calls it BusinessOwners JSON:
She adds a bookmark (right-click > Insert Bookmark or Ctrl/Cmd+B) around her writer feature type and calls it Writer Feature Types:
Jennifer clicks Run to run her workspace and convert her data.
After the workspace has run, the Translation Log reports that the “Translation was Successful.” Jennifer selects the writer feature type and clicks Open Containing Folder to confirm the geodatabase has been created.
Jennifer is off to a good start. She has created a new geodatabase from JSON with the business owner data loaded into it. Next, she has to edit the schema.
Follow along with Jennifer’s steps.
